How To Install.
Six steps. One time. Every shoe in your closet becomes a slip-on. Pick your lace type below to see the install for that line.
Pick Your Lace Type.
Each line uses the same 6 steps. Tap a lace type to see the install photos and instructions for that specific build.
Installing Flat Elastic Shoelaces
Our flat laces are designed for any shoe in your closet — sneakers, low-tops, high-tops, and casual builds. Six steps and you’re done for good.

Lace up your shoes as you normally would, in whatever style you prefer.

Slip your shoes on and off a few times to check the fit. Once snug and secure, cut the lace ends with the shoe still on, leaving about the width of the Flat Link. You can always go shorter later — not longer.

Optional — carefully singe the ends to prevent fraying and lock in a clean, sealed finish. Improves durability over time.

Slide our Flat Link onto the laces with the lever fully open. Feed both ends in, seat them all the way, then clamp the link down. Give the laces a tug to engage the teeth firmly.

Bring the two ends of the link together while keeping the lever fully depressed.

Your shoes are now upgraded with Flat Elastic Laces — secure fit, knot-free, ready to slip on every day.
Installing Round Elastic Shoelaces
Round laces are built for runners, athletic shoes, and low-top sneakers — soft tension that flexes with your foot. Same 6-step install.

Lace up your shoes as you normally would.

With the shoe on, check tightness. Cut the lace ends leaving about the width of the Round Link. Go shorter for extra tension if you want.

Optional — lightly singe the round cord ends to seal them and prevent fraying.

Thread both lace ends into the Round Link. Seat them fully, then twist or clamp the link closed for a secure hold.

Bring the two ends together and lock the link. Pull gently to confirm the teeth are engaged.

Your shoes are upgraded with Round Elastic Laces — locked-in fit, ready for the run.
Installing Elastic Bootlaces
Bootlaces use a heavier-duty elastic core built for work boots, hikers, and casual leather boots. Adjustable tension at the end caps.

Lace your boots as you normally would, all the way through every eyelet.

Boot on, fit checked. Cut the lace ends to size — leave enough for the end clip to seat properly.

Optional — singe the cord ends for a clean, sealed finish before installing the end clips.

Feed the lace ends through the end clip in order. The clip will let you adjust your tension after.

Snug the laces up to your preferred tension. Tighter for the trail, looser for the day off — stays where you set it.

Boots are now slip-on. Adjust the tension anytime — the system stays put.
Installing Combat Bootlaces
Combat bootlaces are built for blousing — Coyote Brown with a slim end clip that sits flush under your trousers for all-day comfort.

Lace up your boots as you normally would, ensuring the ends are evenly aligned.
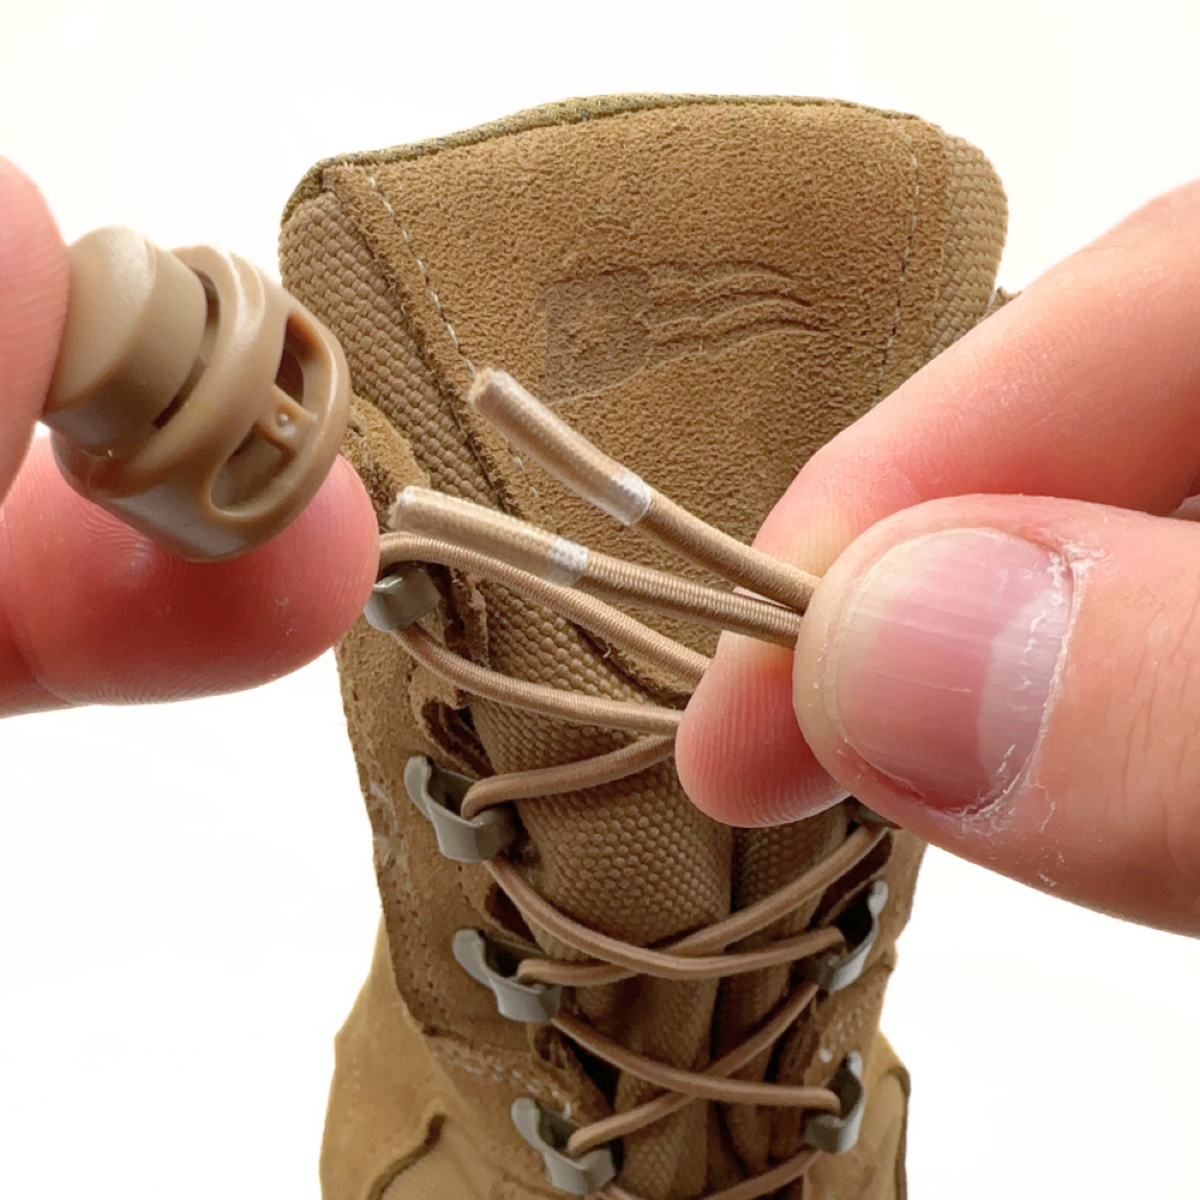
Slide the adjuster onto the laces, positioning it at your desired tension point for a secure and comfortable fit. Slip the boot on and off a couple times to confirm the feel.

Once the adjuster is set, trim the excess lace to your preferred length, leaving enough for adjustments later. If you typically blouse or wrap your bootlaces, cut little to none for optimal flexibility.
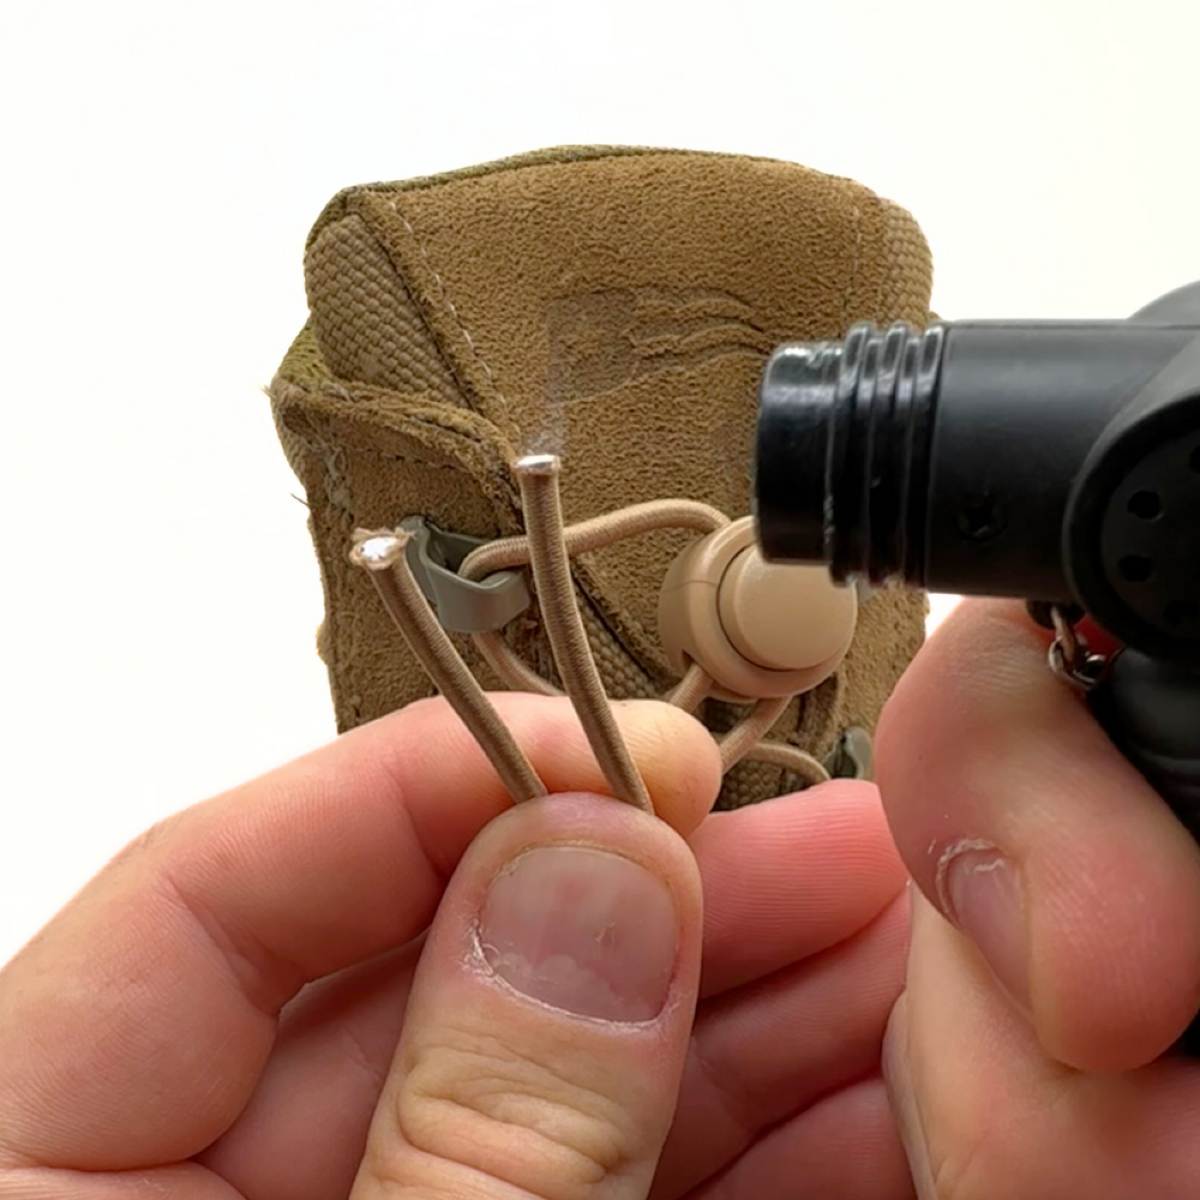
Torch the ends of the laces after cutting to your desired length. Not required, but it prevents fraying and improves durability — a proper singe also enhances the grip of the lace clamp.
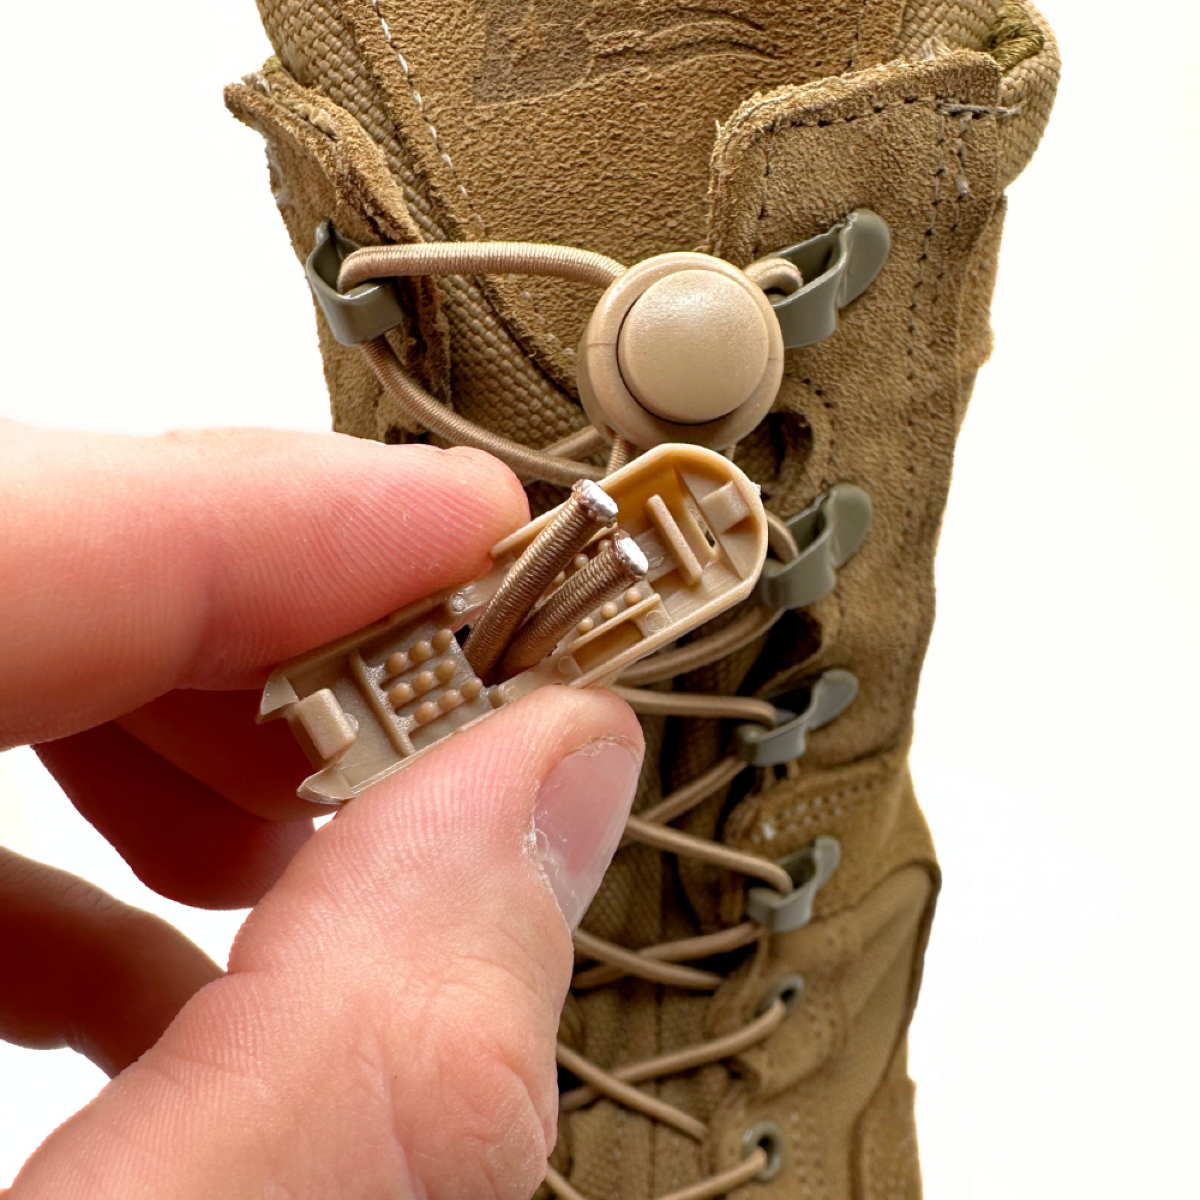
Feed the laces through the back of the lace clamp until the ends meet the casted stop. Properly singed ends create a slight bulge that lets the clamp teeth grip more securely. Close the clamp until you feel it click into place.
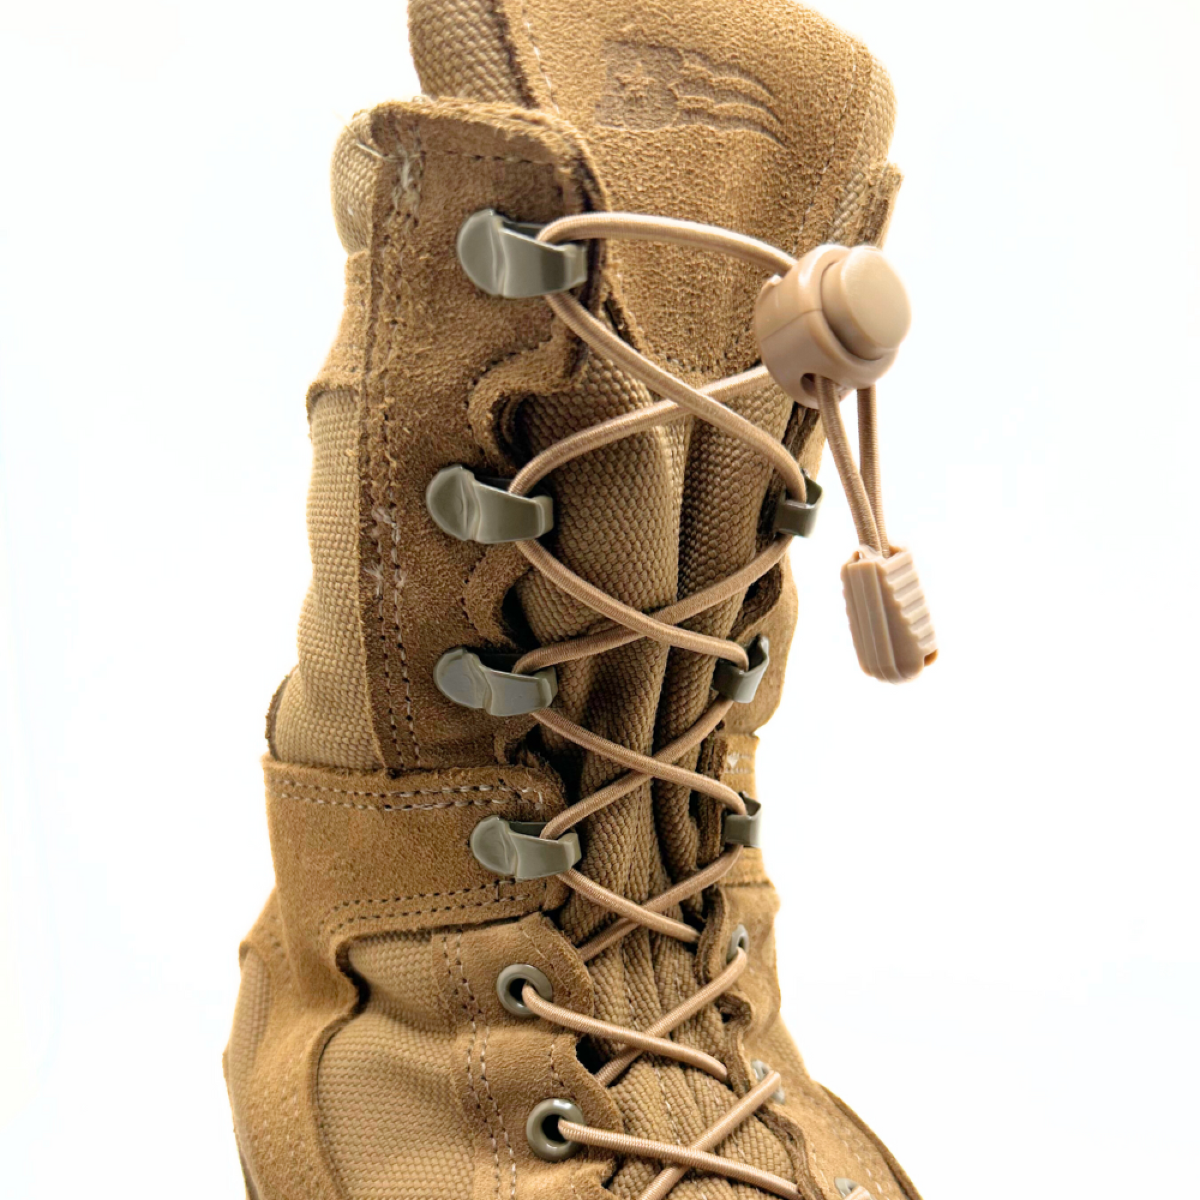
Your boots are now officially upgraded with our Elastic Combat Bootlaces. Questions? Reach out to us at support@lacelinks.com — we’re here to help.
Ready To Upgrade?
Pick your laces and finish the install today.